


 HP power supply conversion to floating ground
Here's my simpler no drill method of converting HP server power supplies to floating ground operation.
Steps:
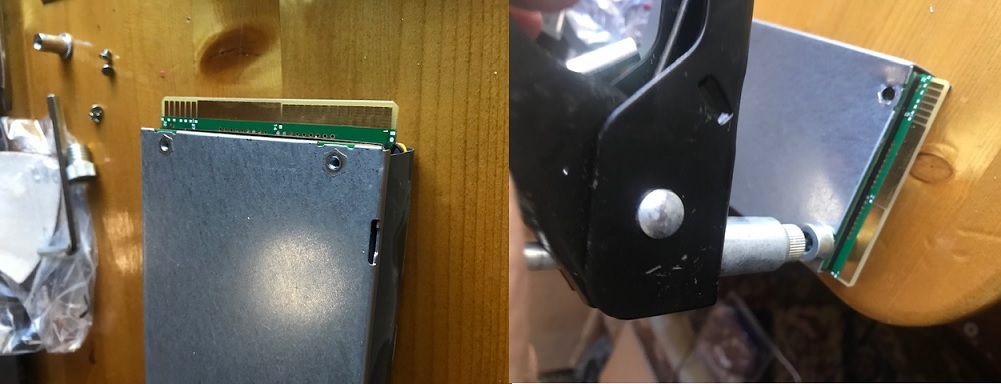
1. Remove the top off of the power supply (four Phillip's head screws).
2. At the back of the power supply remove the two circuit board mounting/case grounding screws.
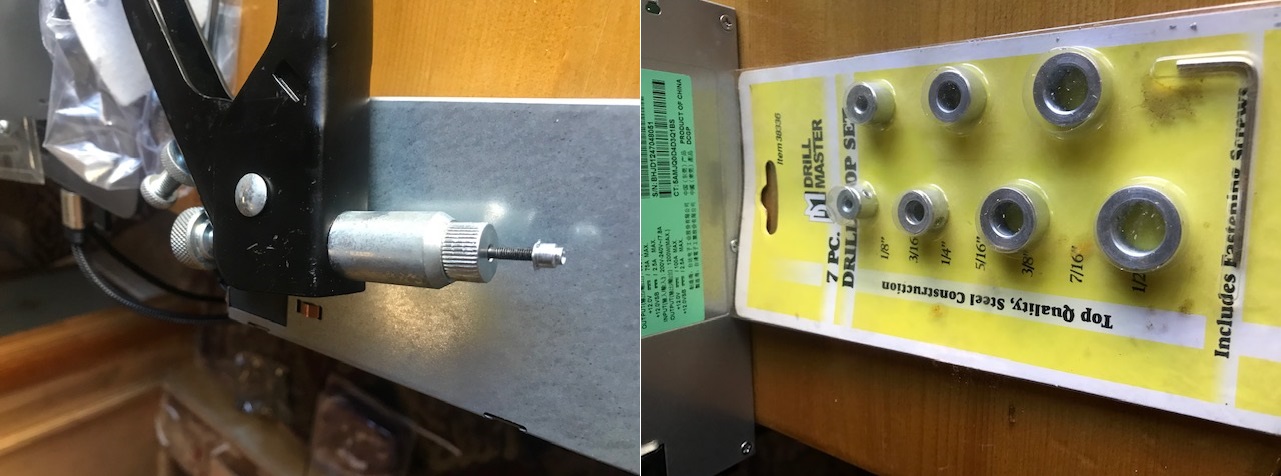
3. Turn the power supply over and screw the rivnut tool shank through a drill stop ring and pull the nut stud out of the case for both screws.
4. Replace the original metal screws with nylon parts and put the top back on the power supply.
Nylon parts that I used:
https://www.amazon.com/gp/product/B0...?ie=UTF8&psc=1
https://www.amazon.com/gp/product/B0...?ie=UTF8&psc=1
https://smile.amazon.com/gp/product/...?ie=UTF8&psc=1
Though when I do it again, I may just use the spacer and some hot glue as the head of the nylon bolt sticks out too much.
The rivnut tool that can handle the small metric screw size that is used in the power supply is:
https://www.amazon.com/gp/product/B0...?ie=UTF8&psc=1
And after we have removed the embedded nut that acted as the grounding post.
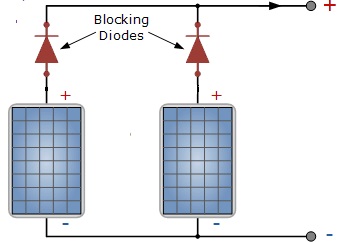
Generally on an RV you wire up all your solar panels in parallel so if one panel is shaded it doesn't affect other panels.
Each panel includes a DC blocking diode as part of it's construction so that current can only flow one way.
In our world a battery isolator performs the same functionality as it has DC blocking diodes as part of it's construction. Though they are more higher amperage then a typical solar panel diode.
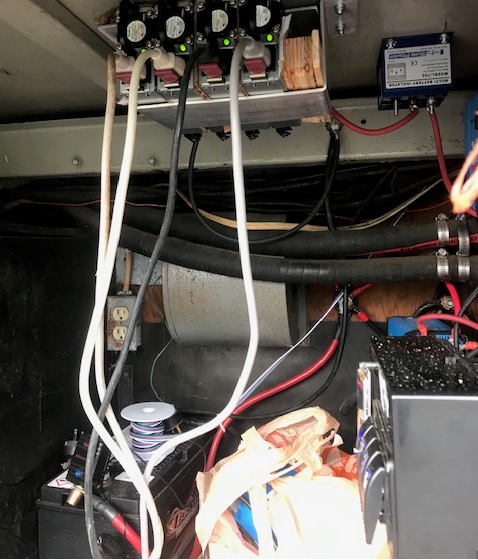
In the above picture you see the metal bracket that I bent up to mount my four converted HP power supplies to the roof of my battery bay.
The power supplies are wired in series and the output runs to a battery isolator which is then wired in parallel with the solar panels on the roof of my bus. I selected the solar charge controller that had the fewest panels connected to it.
The reason that I used four power supplies is to have a higher total voltage then my solar panels put out. By using the battery isolator the charge controller will see whichever device is producing the most power.
A quick note about these power supplies their maximum output is 900watts on 120volts and 1200watts when fed 240V.
The maximum power that you can draw from a 120v circuit is around 1800 watts.
Both the HP power supplies and the solar charge controllers are about 90% efficient.
My solar charge controller output is 70AMP's at 24 volts which is 1680 watts. However back to the efficacy of both devices we talking an input power requirement of over 2000 watts to deliver that much power, which will trip either a circuit breaker or overheat the extension cord.
There is also another rule that should be paid attention too; is that for continuous loads you should not draw more than 80 percent of available power. This works out to an extension cord load of around 1440 watts.
So after working all these numbers I changed the maximum amperage on the solar charge controller from 70 amps to 50 amps. Which is about a 1200 watt charge rate to the batteries.
I purchase my HP power supplies from eBay.
https://www.ebay.com/itm/DPS-1200FB-...72.m2749.l2649
I also purchased adapter boards that fake the power supply into automatically turning on and breaks out the DC voltage to a terminal strip, as this greatly simplified the conversion process that was in the original video that I gave a link too.
https://www.ebay.com/itm/DPS-1200-12...72.m2749.l2649
Note the terminal screws on this boards terminal strip are small; so use multiple (fine wire flexible) wires to carry the load.

 Reply With Quote
